 My sister Jeannine solved that problem by giving me this very practical and useful travel tray, plus it is pretty too. It is basically a quilted, rounded off square with Velcro in the corners to make it close up to make a shallow tray. When I am ready to head home I pull the Velcro apart on the corners to make it lie flat again and slip it into my suitcase.
  I decided to make these for my friends, daughters and granddaughters for Christmas. (when my grandson’s get older I will make them each one to pack but right now at ages 10 and 13 they are a bit young and wouldn’t know what to do with them.)
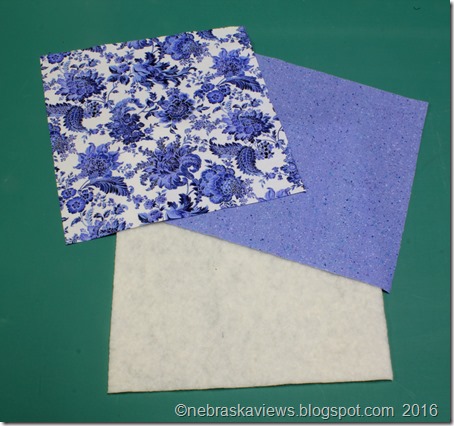 I cut 2 squares at 9 1/2” and one piece of thinner batting about 10 1/2”square. I chose prints for the outside fabric and a lighter more solid fabric for the inside of the tray. Left over pieces of batting work great for this project.
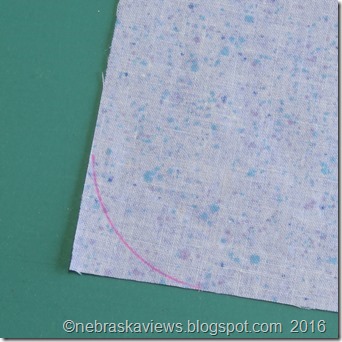
 Round off the corners for ease of construction. You can use a template, old CD or DVD or any other round object to trace around on the wrong side of the lighter fabric to round it off. Mark all 4 corners.
 Layer the two pieces of fabric right sides together then place the fabric on the batting and pin to secure. As you can see the batting peeks out around the two fabrics. Easy to stitch so you don’t have to worry about it creeping away from the seam lines when stitching.
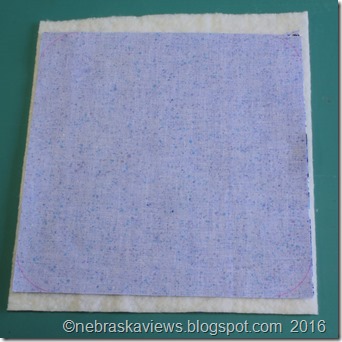 Stitch 1/4” around the rounded square leaving an opening on one side. Back stitch at the beginning and the end. Trim the excess batting away from the seam line leaving just a bit caught in the stitching line. This will eliminate some of the bulk at the seams.
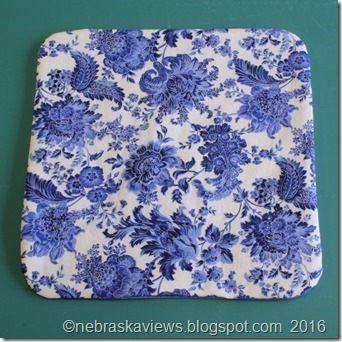
 Turn it right side out and use your finger or blunted object to push out the corners. Press flat keeping the seam line on the edge of the square. Turn under the fabric at the opening and press then pin the opening closed. Top stitch around the entire edge pretty close so it catches the area you left open for turning.
 Mark a line 2” across each side with something that can be removed or not show after stitching. Stitch on those markings and also a diagonal line in to the 2” lines from each corner like the example below.
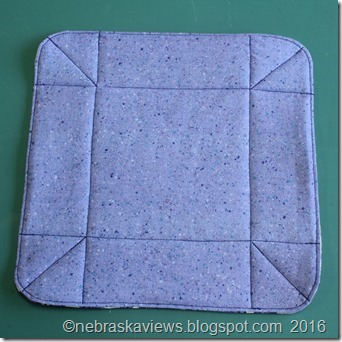 At this point you don’t really have to do any more stitching if you don’t want to but I like to machine quilt the entire piece to make it more dense and a little stiffer. Cut Velcro pieces about 3/4” long and stitch the small pairs of Velcro to each corner. (Tip – make sure you have one loopy side and one hooky side for each corner!)
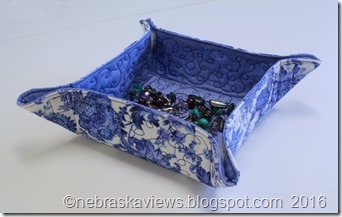
  As you can see the outside (below) is a blue print and quite busy but the inside (above) is a light color so items placed in it will show up. A busy print for the inside would make it hard to see small items placed in the tray – keep inside light and more solid looking.
 This is what it looks like with the Velcro corners pinched together and with some jewelry inside.
 These are very quick to make and wonderful gifts to give to friends and family.
 Check the next post for more photos of all the finished travel trays I made for Christmas gifts.
 Until Later,
Lynn

No comments:
Post a Comment